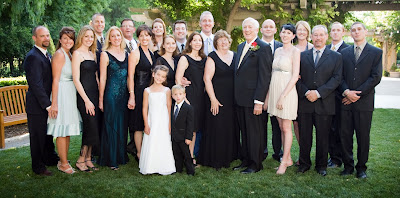
In the old days circa 1980, photographers would take one to two hours to do the family group formal photos. The photographer would set up lights and have several assistants running around making sure everyone in the shot was absolutely perfect. The issue back then was, these were the shots he made most of his money on so it was imperative that the shots were perfect. AND, don't forget, he was shooting film so everyone in the photo had to be looking at him without blinking in at least one shot. Today, I can just swap out a head in Adobe PhotoShop if that person happened to not look their best. Brides and grooms no longer want to take an hour or more for these portraits. They want to get to their guests and their party. Here are some tips to help make the formal portrait session go as smooth as possible.
1. Get a list from the bride BEFORE the wedding. (See below for a sample list)
2. Have the bride and groom select one person from each side (2 people) to help you organize the groups. This person, who should be a bold type "A" person, will be in charge of gathering the groups before the photo is to be taken so they are waiting in the wings ready to go.
3. Position the bride and groom and tell them to stay put.
4. Have family members on either side facing the couple so they are filed in behind each other at a 45 degree angle. This will save you space and make most people look thinner.
5. Never let people put their arms around each other since this will make them look odd.
6. Watch the bride's dress. It does not need to be fanned out but if she wants it to be make sure whoever is standing next to her gets close and shuffles their feet under her dress.
7. Take 6 photos of each grouping to make sure you get a good one.
8. Do not allow other photographers (family with cameras) to shoot over your shoulder. If you allow this to happen while you are shooting you will end up with photos where only a few people are looking at you and everyone else is looking at other cameras. If you choose to allow others to shoot, kindly ask them to wait until you tell them it is okay. After you take your photos then direct the group to look at the other person's camera. YOU NEED TO TAKE CHARGE SO PEOPLE KNOW WHO IS IN CHARGE. If you are meek behind the camera, you will need to hire an assistant who is not meek and who can be a loud, bold yet polite director.
9. Start with the largest family grouping first. I often start with a big group photo of both families combined. When everyone is there I have a captive audience to tell them to NOT go wandering off until they are released otherwise they will most likely miss their photo since it will only be about 20 minutes to get through everyone.
10. Try to fit any grandparents in the beginning of the session if they are too old to wait around for 20 minutes.
Formal Grouping Sample List
1. Entire Combined Family (Both Sides)
Bride's Side:
2. Bride and Groom with Bride's Entire Family
3. Bride and Groom with Bride's Immediate Family
4. Bride and Groom with Bride's Parents
5. Bride and Groom with Bride's Siblings
6. Bride and Groom with grandparents
7. Bride and Groom the Smith Family
8. Bride and Groom with the Jones Family
Groom's Side:
9. Bride and Groom with Groom's Entire Family
10. Bride and Groom with Groom's Immediate Family
11. Bride and Groom with Groom's Parents
12. Bride and Groom with Groom's Siblings
13. Bride and Groom with Groom's grandparents
14. Bride and Groom the Thomson Family
15. Bride and Groom with the Connor Family
You get the idea. Make sure you get this list before the day of the wedding so you can rearrange it for the best flow. Print two copies out for the day of the wedding and try to get it all on one page. Give one copy to the person in charge of helping you at the time of the picture taking.
TIP: Tell everyone in a large group "if you cannot see my lens then it cannot see you."


No comments:
Post a Comment